Lesson PlanS


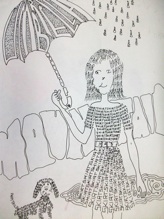
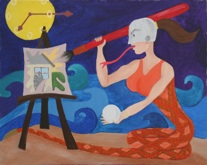
Word Pictures
Description of Word Pictures Lesson Plan

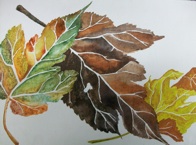
Watercolor Leaves
Goal: to teach students the basic watercolor painting techniques, focusing on textures using salts and blending washes
Standard: 1.1 use principles of design in discussion.
2.1 solve visual arts problem
2.4 review & refine observational painting techniques
Materials: Pencils, newsprint and watercolor paper, reference materials and sample paintings
Procedure: Demonstrate watercolor wash techniques (use instructional video)
Draw leaves on paper concentrating on placement in the composition,
overlapping and bleeding off the edge of the paper creating an asymmetrical focal point
Students must draw 3 thumbnail drawing of the leaves with empty space for the veins
Each student will create preliminary drawings on newsprint.
The final project will be a watercolor painting on white paper that uses
salts to create pigment spots simulating texture
Vocabulary: Composition, observational drawing, vertical, horizontal, diagonal, static, dynamic, organic, pigment, wash, bleed, blend, focal point, thumbnail
Assessment/evaluation:
Students will be graded on how well they follow procedures
Students will be graded on whether or not they successfully attempted
to create the textural composition
Students will be graded on their final painting craftsmanship and composition.
Students will be given a written assessment.
A= 3 thumbnails with asymmetrical focal point
Transfer sketch drawing to white watercolor paper
Paint using watercolor and salt textures
Attention to craftsmanship
Answer the assessment questions in complete paragraph form
B= 2 thumbnails with asymmetrical focal point
Transfer sketch drawing to white watercolor paper
Paint using watercolor and salt textures
Attention to craftsmanship
Answer the assessment questions
C= 2 thumbnails with focal point
Transfer sketch drawing to white watercolor paper
Paint using watercolor and salt textures
Paint using watercolor
Answer the assessment questions
D= Draw your sketch on white paper
Paint your composition
F= Did not turn in the project

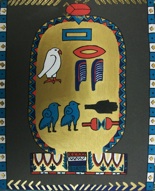
Cartouche
Description of Lesson Plan
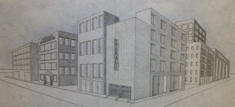
Perspective Cityscape
Objective: Students will learn a brief lesson on technical illustration
Students will learn the vocabulary and tools related to drafting.
Students will draw an architectural style rendering.
Standards: 1.1, 1.5, 2.1, 2.6,
Materials: newsprint, pencils, rulers, white paper, T-square, masking/drafting tape, triangles
Discussion: Step by step demonstration on the use of the drafting tools
Hand out showing step by step procedure for the success of the project
Activity:
1.Sketches on Newsprint to practice perspective.
2.Redraw on final white paper add color in sky using blue pencil.
3.Include details such as signs, windows and doors.
Assessment
Sketches
Originality of design
Precision,
Craftsmanship,
Presentation, neat, complete
Timeliness, cooperation, clean-up

Modigliani Portraits
MATERIALS:
12"x 18" white canvas
paper, pencil, acrylic paints, brushes, visual samples of the artists work
OBJECTIVES: Students will...
learn about the artist Amadeo Modigliani. Sketch a self-portrait in the "primitive art style".
Paint using acrylics
DISCUSSION:
Talk about Modigliani Handout - Amadeo Modigliani was born in Italy in 1884. He died in 1920, when he was only 36 years old, from tuberculosis. He was very interested in African art. He liked the way African artists made their masks - with long, oval faces and long necks, large eyes, long noses, and small mouths. He used these features when he painted portraits of people. (Show examples of his work if available.) Even though his people don't look real, they do look like people - people with distinct personalities.
ACTIVITY:
Using a mirror, students will examine their own features. They will sketch using shading, layering, color blending, etc. Background should not be colored. They must focus on Mood, expression, color, placement (head tilt)
The final portrait will be painted using acrylics on canvasette. The face will be the focal point with a close up of no more than to the waist. The figure will be seated on a chair in a solid colored room.(Wearing a solid color outfit). They may wear a hat or have other features that represent themselves. No writing, style includes an oval face, long neck, long nose, large eyes & small mouth. Sketchy brush stroke with many values, Color palette is dull and toned down.
VOCABULARY: Modigliani, primitive art style, Elongation,

Paper Mosaics
Objective: Students will learn a brief art history lesson of Rome
Students will learn the vocabulary related to Roman style and the
procedure for making real Mosaics.
Students will make a paper mosaic.
Materials: Various color selection of construction paper.
ScissorsRulersCompass (or round template)
White GlueToothpicks (to spread small amounts)
Video: PBS video on Roman History, Art and Architecture (60 min.)
Discussion: Background and handouts about the Greek influences on Roman
Styles. Show overhead examples of Roman styles of Mosaics. Include the
surfaces that the mosaics were produced on. Explain and give examples
of Tesserae.
Activity: Steps for making a paper mosaic.
1.Sketches on Newsprint to practice geometric border patterns around a circle.
2.Additional sketches to get the subject for the center of their mosaic.
3.Draw a large round circle on the paper to set the limits of the design.
4.Transfer the sketch ideas to a finished drawing as a pattern for the piece.
5.Select color palette of construction paper.
6.Start cutting small pieces of paper to glue down as the “Tiles”.
7.Begin gluing the central design.
8.Then do the border.
9.Then fill in the open (negative) space between the two.
10.Stress that NO tesserae will ever overlap.
Assessment: Group discussion of the overall success of the project. Each student will receive a grading sheet containing the parts of the project on which they will be graded.
Sketches
Originality of design
Composition, “Roman style” and color palette
Craftsmanship,
Presentation, neat, complete
Timeliness, cooperation, clean-up

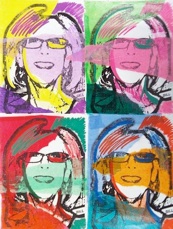
Warhol Inspired Self portraits in Color Schemes
Objectives:
•Students will gain an understanding of Andy Warhol's work and the origins of "Pop Art".
Vocabulary: Andy Warhol, pop art, portraits, color schemes, collage, bold, repetition
Materials:
•visuals of Andy Warhol's work
•drawing paper
•pencils
•Digital Camera / Photoshop / Printer
•Crayons, tissue papers, markers
•glue
•black marker
Procedure:
1.Introduce Andy Warhol to the class. (Power point slide show) If possible have reproductions of "100 Soup Cans and 25 Marilyns 1962. Explain the term "pop art" and how the term applies to Warhol's work. Also point out the use of repetition in Warhol's work and how he wanted to become a machine.
2.Explain to the students that they will be creating self-portraits, but using Warhol's sense of color and use of repetition. Take a digital photograph of each student and eliminate the color and details using Photoshop. Print 4 copies of each image. Remind the students to keep it simple and not to add to much detail.
3.If no cameras or computers are available have the students draw themselves (using a mirror or photograph (school ID will work). Before the next class, photocopy each student's portrait 4 times. This is the repetition part of the lesson.
4.Each student will glue mount the copies onto 1 larger sheet of paper. They will then choose 4 different color schemes to color each of the portraits. They must use the same designs or materials on each only varying the colors. Tissue papers are layered over the images so that they can be seen through. Then additional details are added onto each. Suggest that they stay away from earth tones and stick to bold, neon, contrasting colors.
5.Each student will complete a written assessment at the end of the studio project to re-cap their understanding of the concepts.

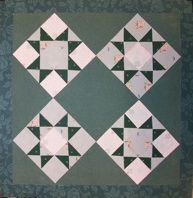
Paper Quilt
Description of Lesson Plan

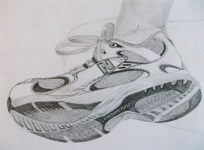
Drawing
Description of Lesson Plan

Snake
Description of Lesson Plan

Texture Word
Description of Lesson Plan
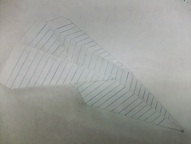
Technical Drawing Paper Airplanes
Objective: Students will learn a brief technical drawing procedure with references to drafting
Students will learn the vocabulary related to technical Illustration.
Students will draw a paper airplane using parallel lines & values.
Standards: 1.1 principles of art & design
2.1 Solve visual arts problem
2.4 Review & refine observational drawing techniques
Materials: newsprint paper, pencils, white drawing paper, blue colored pencil, T-squares, rulers, triangles, drafting tape, erasers, notebook paper
Video:
Discussion: Background about drafting, drawing, technical illustration, cartography & careers
Show overhead examples of completed assignment
Review vocabulary, discuss computer-generated images
Activity: Steps for making drawing
1.Fold paper airplane
2.Sketches on Newsprint to determine size & placement.
3.Use tools to create parallel & perpendicular lines.
4.Add details & values.
Assessment: Group discussion of the overall success of the project. Each student will receive a grading sheet containing the parts of the project on which they will be graded.
Sketches
Craftsmanship, accurate measurements & parallel lines
Value & shading
Timeliness, cooperation, clean-up

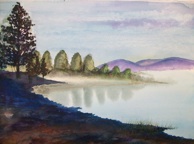
Water Color Landscape
Description of Lesson Plan
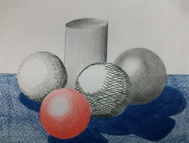
Shading
Description of Lesson Plan


